LOR Trackguide Monaco
Contents
General
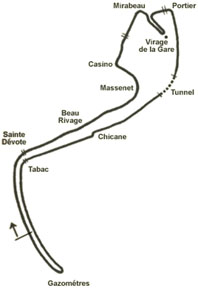
THE 1.954 MILE circuit de Monaco is one of the toughest circuits in GPL, along with the Nurburgring. The track is very tight and twisty and, with just one exception, quite slow. The barriers are everywhere and extremely unforgiving. All this means that there is no margin for error at all. If you are off by an inch you'll be in the barrier and out of the race. The track requires a smooth and very patient driving style. Trying to push the cars through the tight hairpins and narrow turns won't help your lap times. The track isn't very physically demanding, but after a full length 100 lap Grand Prix you'll be exhausted from the level of concentration required by this track. But putting all this aside Monaco is a fantastic track to drive. The town is beautiful to look at, although I'd wait until after you finish or crash out to do that. It also has some extremely challenging corners, like the chicane which, after taking it flat, makes all modern street circuits look like wide open ovals.
Car Setup
Monaco is all about grip. You have to get the maximum grip possible from every part of your car. If you can't get the power down out of the turns you can forget about setting a fast lap time. As far as cornering speeds go, all the turns are quite slow, with the exception of the chicane. Although the chicane isn't really a turn, as much as a very tight straight.
Start with a soft setting for everything - shocks, anti roll bars and tyres. The need to be smooth when driving is very important. If you are throwing the car into the turns a soft setup won't work. Then you'll have to stiffen things up a little thus loosing the all important grip out of the turns. So when you are setting up the car remember to be smooth under braking, acceleration and transitions.
Go for a neutral setup as a starting point. Then once you have the car working well you might want to try putting a little understeer into it. If you really want you can disconnect the rear anti roll bar by setting it to a zero value. A slight understeer will help under braking into several of the turns, especially Gazometres and Massanet.
Brake balance is extremely important here. The first impulse is to set it quite far forward as a lot of braking is done down hills or round corners and you don't want the rear stepping out. However if you go too far forward the fronts lock up very soon and you then have to back off. I find that a setting of around 58 or 59 works well combined with a slight understeer.
Gear ratios are a little tricky here. You want them pretty close together to get the best acceleration. However, don't go too low in first or you'll be spinning your wheels out of all the corners. Top gear can be set into Tabac. You probably won't get any faster than about 155 mph approaching this turn. As you may short shift a lot it's hard to come up with the absolute best gear ratios, but bringing them close together is a good way to start.
Ride height is fairly easy to set at this track. You don't want to be too low because you want the car to be able to have smooth transitions from braking to acceleration, etc. Lowering it too far will cancel out the soft suspension. Also don't go really high trying to avoiding bottoming out at the chicane. As you are riding the curbs there you will hit the ground no matter what, so don't use that as a reference point for ride height.
Tyre pressures will help with grip as well. However as the speeds at Monaco are relatively slow you will need multiple laps to get a proper reading on the tyres. Remember this when you are qualifying. You will probably need about five or six laps to get the best out of your tyres.
As for steering lock you'll need it pretty much maxed out. With two extreme hairpins and lots of other tight turns, you'll need the wheels to turn as much as possible.
Goals
You should aim for a qualifying lap of about 1:27.50 to 1:28.50. That should put you pretty far up the grid. During the race you should aim for 1:28.50 to 1:29.50, depending on fuel loads, for your lap times if you don't encounter traffic. You won't loose several seconds just by reading this, that takes practice and experience. But, hopefully, this will help you get there faster.
The Race
A race at Monaco is about survival. Don't do anything stupid and you should finish well. Probably half the field will crash out. Be extremely careful at the start and on the first lap. You basically can't pass anyone at the start, so just get off the line cleanly. Also don't try any moves on the first lap, it's just not worth the risk. The chicane is tricky too. A great overtaking zone follows it as you brake into Tabac. However, if the guy ahead screws up the chicane you will be taken out as well. When you push them, the chance of them making a mistake increases, so be very careful through when following anyone closely. As far as good overtaking zones, well there are none. Possibly into the final hairpin if the other guy screws up their braking. Or maybe at one of the slow corners at the top of the track, but make sure the other driver knows you are there. Keeping your concentration is all important. Don't try and push because you'll probably crash out. Being smooth will probably yield faster lap times in the end anyway. Also short shifting can sometimes help you when you have cold tyres. After Tabac, for instance, short shifting will help to prevent the rear end from spinning around.
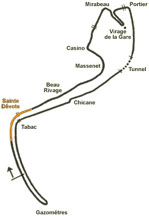
Sainte Devote
- Entrance speed: approximately 135 mph [217 kph]
- Speed through the corner: approximately 80-85 mph [129-137 kph]
- Arrival time at the corner: 4.51 seconds
- Time to negotiate the corner: 5.27 seconds
- Exit time of the corner: 9.78 seconds
Sainte Devote is not a hard corner to get through, but is quite difficult to get through quickly. It has a relatively fast entry and leads onto a long 'straight.' A good exit is therefore very important. This means you don't want to be sliding around as you are trying to get the power down. This means that you shouldn't try and brake too late as you enter the turn.
You'll be up to fourth gear as you approach the turn. Move the car over to the left side of the track. Be careful not to get too far to the left, as you don't want to risk a brush with the barrier. Even though there are tons of buildings near the track I wouldn't use any of them as reference points for braking. Doing so would take your eyes off the track, something you just can't do at Monaco.
Just after the white line denoting the end of the pit lane disappears at the right, the racing groove gets darker. Continue on until just before it lightens up a little and then begin to brake. After several laps you'll instinctively know where to begin braking without needing a reference point. Brake moderately for a moment and shift down a gear.
You want to turn into this corner gradually and ease off the brakes as you do so. Just before the wall ends on the right start turning in gently. Ease off the brakes completely when you turn in. The engine should do the rest of the braking for you. This will help you get round the turn without losing the rear end. If you are going too fast to make the turn without more braking then you are either not braking hard enough at the beginning or are braking too late.
Continue to bring the car through the turn and use the engine to lose some more speed. Slightly before reaching the 'Fina' bridge you should get back on the throttle and maintain your speed. When the curbing begins at the bridge you want to be right next to it. Gently get back onto the throttle as you pass under the bridge and let the car move out to the barriers as you accelerate. Make sure you don't get right against the barriers as they come out to the right a little farther up Beau Rivage.
Remember the main key to this turn is a smooth exit. This will give you a great launch onto Beau Rivage. If you brake too late and get a bad entry you'll be sliding all over the place trying to keep the car on the track as you exit the turn.
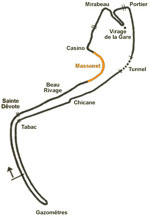
Massanet
- Entrance speed: approximately 135 mph [217 kph]
- Speed through the corner: approximately 60 mph [96 kph]
- Arrival time at the corner: 14.80 seconds
- Time to negotiate the corner: 7.58 seconds
- Exit time of the corner: 22.38 seconds
The Beau Rivage 'straight' leads you into Massanet. This up hill run meanders slightly left and right and has barriers coming right to the track. Try and forget about the barriers and drive a straight a line as possible. this will put you in good stead when you begin to brake for Massanet.
Approach
You'll be up to fourth, or possibly fifth gear, depending on your gear ratios, when you approach the braking zone. Like Saint Devote there are loads of buildings to look at for braking, but don't bother. After the Coca-Cola bridge, the armco bends to the left and then ends. Just before it ends is when you should start to brake. An important thing to consider when braking for this turn is that you are coming up hill as you brake and then the track turns left and starts downhill again. So you'll be cresting the hill under braking which means the rear will get very loose and you could spin unless you ease off the brakes before hand.
Massanet has a long gentle entrance and then tightens up near the end. This can be used to your advantage when braking in that you don't need to get the car completely slowed down until then end of the turn. So just before the armco ends (see above) brake moderately and shift down a gear. Continue in a straight line with consistent braking until just before the crest of the hill.
Apex
The hay bails on the left are at just about the same place as the crest of the hill if you need a reference point. Here you should ease off the brakes to prevent losing the rear end. Wait a beat, shift down a gear and get off the brakes completely. Turn into the corner following the racing groove. Keep the car as close to the curbs as possible as you pass the building with the 'Bardahl' awnings on your left. Continue to use the engine to lose speed until you get to the wall on the left. Now increase the throttle slightly to maintain a constant speed.
Exit
The corner has been tightening and slowing down progressively and you've been matching this with the engine. Just before getting to the casino building on your right you'll have to back off a little more to make the last part of the corner. Your exit needs to place you on the left side of the track in order for you to make the Casino turn properly, so don't try and push the car too much at the end of Massanet.
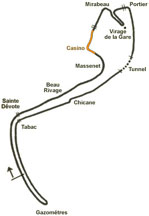
Casino
- Entrance speed: approximately 70 mph [112 kph]
- Speed through the corner: approximately 60 mph [96 kph]
- Arrival time at the corner: 23.38 seconds
- Time to negotiate the corner: 2.53 seconds
- Exit time of the corner: 25.91 seconds
Approach
There will be a brief moment between exiting Massanet and entering Casino when you can straighten out and accelerate. Do so and then start to turn in to Casino following the racing groove. This turn is fairly easy and requires no braking. Just don't try and rush the turn or hit the barriers.
You'll still be in second gear after exiting Massanet. As you turn in to hit Casino.Yease off the throttle a little to give the front wheels that little exit grip they need. You want to get a late apex here to get a good run down to Mirabeau. After easing off and turning in, get back on the throttle to maintain a constant speed through the turn.
Exit
Make sure you don't start turning in too late or you'll go wide on the exit - and with the barriers and the uneven road surface you don't want that. It is almost as if you should start turning in slightly sooner than you think you need to in order to get a good apex. If you do turn in too soon, don't turn away from the armco, just add a little more throttle to push the front of the car out a bit.
The exit is the pretty straight forward. Just be careful of the famous bump in the track on the left. I usually shift up a gear right when I go over it. This helps me to keep the rear of the car behind me.
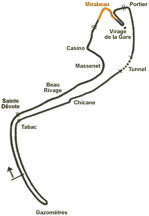
Mirabeau
- Entrance speed: approximately 95 mph [154 kph]
- Speed through the left hander: approximately 30 mph [48 kph]
- Speed through the hairpin: approximately 25 mph
- Arrival time at the corner: 28.42 seconds
- Time to negotiate the corner: 5.96 seconds
- Exit time of the corner: 34.38 seconds
Approach
Mirabeau leads us into the very slow and twisty part of the track. If you got a good run out of Casino you may be able to out brake someone here. The main thing here is not to lose the rear end under braking. It's very easy to do this as you are coming downhill into the turn. The fence on the left is a great braking reference point. When you get there brake fairly hard. Continue in a straight line, and after a beat shift down a gear. Don't shift down too soon or you risk losing the rear end as the engine revs increase. Then just before you turn in, shift down again to first gear.
Middle
Mirabeau is a double apex right hander followed by a slight left hand bend. So when you turn in, you should aim for an early apex at the first part of the right hander, then drift out a little and then pull the car back into the second part of the right hander for a late apex. This is all one continuous turn when done properly.
Exit
You should continue braking until just before hitting the first apex. As you turn in you'll have to ease off slightly to make the turn. If the rear end starts to step out, add a little power to keep it in line. Then try and maintain your speed through the right hand part of the turn. Just as you are exiting it start to accelerate again. Shift up to second gear right when you are about to turn left for the left hand bend. Take a late apex for this that lines you up right next to the curb on the right. All of your acceleration should be smooth and gentle. You will probably never be under full acceleration, as doing so could easily spin your rear wheels.
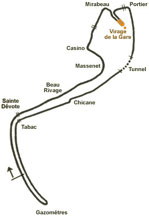
Virage De La Gare
(Station Hairpin)
- Entrance speed: approximately 70 mph [112 kph]
- Speed through the corner: approximately 18 mph [29 kph]
- Arrival time at the corner: 35.83 seconds
- Time to negotiate the corner: 4.91 seconds
- Exit time of the corner: 40.74 seconds
Approach
The Station Hairpin - Loews hairpin - Grand hairpin - is one of the two dead slow hairpins at Monaco. At less than 20 mph traction is key here. A slow entrance along with a pretty slow exit makes this turn feel like it goes on forever. It is very important not to rush the car through here or you'll understeer away from the apex and lose a lot of time, not to mention opening the possibility of being passed.
Apex
After coming round the slight left hand bend at the exit of Mirabeau, you should line up right against the curb on the right. A moment or so after getting alongside the curb, brake carefully, holding the car against the curb. You don't want to lock the front wheels up, so be careful that you don't brake too hard or too late. Doing so will mean you'll go wide and end up being slow.
Exit
Just before reaching the end of the curb, shift down to first gear. You want to turn in to hug the inside of the corner all the way around, with a middle apex. Turning in too soon or too late will prevent you from being able to do so. As you go round the turn you should be off the brakes, and holding your speed on the throttle. Don't get back on the power until you are almost fully out of the turn, which is about when you pass the last of the hay bails on the right. Be careful under acceleration down the hill as well.
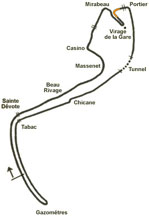
Turn Six
- Entrance speed: approximately 55 mph [88 kph]
- Speed through the corner: approximately 33 mph [53 kph]
- Arrival time at the corner: 42.55 seconds
- Time to negotiate the corner: 3.05 seconds
- Exit time of the corner: 45.60 seconds
Approach
Even though this turn is considered part of Portier, I think they are far enough apart to be independent of each other. You continue the downward run towards the sea with this tight right hander. You'll be in second gear as you approach this turn. Make sure you are over on the left side of the track. Just before the wall begins on the left, the racing groove darkens. At this point brake lightly for a moment and shift down. Then get off the brakes and turn into the corner. As you are going so slowly, you don't need to use the brakes to slow down. The engine and resistance of the wheels will slow you down fast enough.
Apex and Exit
You want to go for a slightly early apex here, so turn in just after you brake. If the rear end starts to slide out as you are turning in, give the car a little more power and correct with the wheel. Like the hairpin, you don't want to push the car through here too fast or you'll go wide. But you don't want to wait until you are entirely out of the corner either. So after the apex begin to get onto the power again. As you straighten out the car increase your power until you are up to full acceleration. This should happen at about the time you get next to the curbs to the left. Be careful not to spin the rear end out as you accelerate.
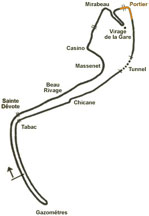
Portier
- Entrance speed: approximately 58 mph [93 kph]
- Speed through the corner: approximately 32 mph [51 kph]
- Arrival time at the corner: 47.07 seconds
- Time to negotiate the corner: 3.17 seconds
- Exit time of the corner: 50.24 seconds
Approach
You have a brief stint of acceleration which should get you up to second gear before you reach Portier. The important part of this turn is the exit. It leads onto the fastest stretch of the track. So if you are sliding about as you exit you'll be slow. It's similar to Sainte Devote in this respect.
Apex
Just as you go under the bridge, brake and shift down to first. In similar fashion to the previous turn, you can use the friction of the tyres and the engine to slow you down. However, as you need a fast exit, stay on the brakes slightly longer here. Taking an apex just past the middle will give you the best exit line.
Exit
Turn in about two-thirds of the way under the bridge. As you reach the apex, shift up to second gear. This will help your traction out of the turn. Once at the apex, begin to accelerate carefully. You don't want to push the car too far out as you exit. At the same time you don't want to wait until you are completely on the straight to begin accelerating. You'll probably have a minimal slide as you are exiting, which is fine. If you are sliding all over the place under acceleration, then you may want to look at your setup to try and get more grip.
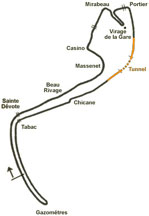
The Tunnel
- Entrance speed: approximately 110-115 mph [177-185 kph]
- Speed through the corner: approximately 115 mph [185 kph]
- Arrival time at the corner: 55.45 seconds
- Time to negotiate the corner: 1.89 seconds
- Exit time of the corner: 57.34 seconds
Approach
The tunnel at Monaco isn't as long as it is now, but it's still pretty spectacular as you exit it and see the entire city of Monaco ahead. Just like Portier, the key here is the exit. You need a fast exit to make the most of the run down into the chicane.
You won't be able to run flat through the tunnel, so you need to decide when to back off. Backing off sooner is better because then you can turn in and get the power on sooner, resulting in a good exit.
After full acceleration you should be up to fourth gear by the time you get to the entrance. I shift up to fifth just before entering the tunnel even though I am not at red line in fourth. That lets me go from the tunnel all the way down to tabac without having to shift. Backing off just before entering the tunnel, at the same time as you shift up, will let you keep the car against the curb in the tunnel. It's quite dark in the tunnel, so seeing the curb can be difficult sometimes.
Exit
About halfway through the tunnel start to get back on full throttle. (You are never actually completly off the throttle as you enter the tunnel.) You should definitely be up to full throttle before you exit the tunnel. Let the car drift out to the left as you are exiting it. You may need a little opposite lock to prevent running onto the curbs with the rear wheels. This is absolutely awful if it happens as you'll be out of shape as you approach the chicane - something you do not want to do. As you accelerate towards the chicane, don't be in a hurry to get back to the right. Take your time and be smooth, as you are setting up for the chicane right when you exit the tunnel.
Chicane
- Entrance speed: approximately 150 mph [241 kph]
- Speed through the corner: approximately 150 mph [241 kph]
- Arrival time at the corner: 1 minute 2.50 seconds
- Time to negotiate the corner: 0.34 seconds
- Exit time of the corner: 1 minute 2.84 seconds
The chicane is definitely the hardest part of the track. It's very easy to misjudge it, and spin the car, and in real life end up in the harbor, but not in GPL - you just bounce off the force field and end up back on the track.
During qualifying you want to take the chicane without lifting, but during the race a slight lift will help you get through it 100 times. You should be in top gear from the exit of the tunnel, so you don't need to worry about shifting. Being relaxed is key here. Try not to think too much about getting within an inch of the barrier as you go through the chicane, just go through it, sort of a zen thing actually.
The track starts downhill sharply before the chicane. You will probably have to lift slightly just before this happens or you'll get loose for a moment. You definitely don't want the rear of the car sliding about as you enter the chicane. Once over this crest, get back to full power.
The aim is to go through the chicane in a straight line with no steering input. You want to aim for the edge of the armco on the left as you enter and then just go through. Remember that the car is pretty likely to go where you are looking, so don't look at the hay bails on the right. Look ahead towards Tabac.
The racing groove is ridiculous here, you could never actually go though the chicane as it does, unless you are going 10 mph. You should hit the curb on the left a moment before the armco ends. Riding that curb through will place you right next to the hay bails as you exit. The rear wheels will get airborne as you go over the curb, so be prepared for a little sliding when they touch down again. If you have to, back off a little to get the car under control again. However, the perfect line means you won't have to back off.
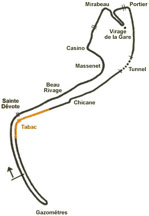
Tabac
- Entrance speed: approximately 155 mph [250 kph]
- Speed through the corner: approximately 45 mph [72 kph]
- Arrival time at the corner: 1 minute 4.34 seconds
- Time to negotiate the corner: 6.26 seconds
- Exit time of the corner: 1 minute 10.60 seconds
Approach
After the chicane, Tabac is simple. Just don't brake too late or you'll be in the armco. Get the car over to the right as you approach the turn. Just before the racing groove darkens start to brake and begin shifting down to second. Then as you continue towards the turn increase the pressure on the brakes.
Slightly before you turn in, there is a dip in the track. This can catch you out if you are braking too hard as your front wheels could lock, or your rear wheels may slide to the right depending on your setup. So be aware of this.
Apex
Use the racing groove as a guide for turning in. You want to aim for a middle apex at this turn. Continue to trail brake all the way to the apex. As you approach the apex, get onto the throttle a little to balance the car. You should be able to get right next to the wall when you hit the apex.
Exit
Exiting can be a little tricky as well. Start to increase the power beginning at the apex. As you leave the corner try not to steer left too much or you could easily spin. Instead once you get the car relatively straight coming out of the corner, aim at towards the armco on the right. Then carefully straighten the car out, possibly using a little opposite lock. This should give the best possible traction out of the turn and also place you on the right side of the track.
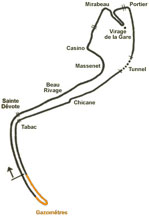
Gazometers
- Entrance speed: approximately 130 mph [209 kph]
- Speed through the corner: approximately 18 mph [29 kph]
- Arrival time at the corner: 1 minute 16.26 seconds
- Time to negotiate the corner: 8.04 seconds
- Exit time of the corner: 1 minute 24.30 seconds
Approach
After getting to this point you don't want to ruin your lap by spinning under braking into Gazometres. It's quite easy to do, as you need to turn as you brake, and you need to brake hard to get down to 20 mph.
The racing groove is quite far to the right, but I find that starting nearer the middle is better. This lets you take a straighter entry for the first half of the turn, which is when the risk of spinning is highest. You should be up to fourth gear by the time you reach the braking zone. The grandstand on the left is a great reference point for braking. Just after you pass the beginning of it start to brake.
Apex
When you begin to brake, do so carefully and don't shift down yet. As you pass the end of the grandstand begin to shift down carefully. You should be going slowly enough now to avoid spinning. Increase the pressure on the brakes to lose more speed. Carefully pull the car over to the left side of the track as well. The risk now switches from spin the rear to locking up the front wheels. So don't brake too hard. You have more distance than you think as you can trail brake all the way to the apex if you need to.
Exit
Like the Virage hairpin you want to keep the car close into the corner as you go round it. Take the apex in the middle and start to accelerate as soon as you reach it. You'll be in first so be careful not to spin the wheels as you increase your acceleration down the pit straight. You are coming onto another fast stretch so a smooth exit is important.
Downloads
- File:GPL trackguide Monaco by LOR.pdf
- Setup(s) and Replay(s):File:Monacoall.zip


