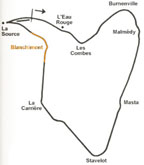
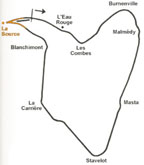
LOR Trackguide Spa
Contents
General
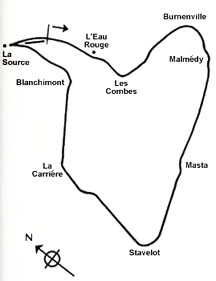
The 8.761 miles Spa-Francorchamps circuit is one of my favorites. More than 50% of it is spent in 6th gear. More than 80% is at full throttle. The track is not one where you need to restrain yourself. You can push the car all the way and it is fun! Flying through the Masta Kink at 170 mph is a thrill, as is Malmedy and, of course, Eau Rouge. The long straights let you draft like crazy as well as letting you think, or psych yourself out, about the next turn. So have fun, keep it floored as much as possible and stay off the brakes.
Car Setup
You need top speed for this track. If you don't have that then you're going to be slow. But you have to go about getting that top speed correctly. To get it you'll need a car that can corner well and let you get on the power before the exit of the turns. If you have to wait until you are out of the turns before getting back on the power no amount of horsepower will make you fast. Therefore the place to start is with chassis handling - shocks and roll bars.
Understeer will destroy your lap times. If you are understeering through Burnenville or Masta you'll be backing off very soon. So give the car a slight oversteer and you should be faster. Don't worry about oversteer being a problem under braking as the only place where you actually brake hard is coming into La Source. Every other turn is a slight slowing or none at all. Burnenville is a great place to test your setup. You should be able to get three quarters of the way through it before you have to back off. If you can't then tighten the rear anti roll bar a little. Make sure you don't make it stiffer than the front though. If you get the car right for Burnenville, you'll be able to push really hard through Masta as well and gain that extra second.
Gearing isn't that difficult. You'll get down to first exiting La Source, but most turns will be third or higher. Use the straight coming into Masta to set you gears. You should be able to get into fifth before reaching the wall on the left. If not, then your exit is either too slow or your gearing is slightly off. Then you should be able to hit 198-200 just before entering Masta. Allow a little extra revs for drafting during the race. I've hit 206 in the draft. You don't want to blow your engine drafting!
Clutches and ramp angles are pretty easy here too. You don't want the rear wheels to spin independently of each other in the turns, so set the clutches fairly high. Also setting a higher power off ramp angle (the second of the two numbers) will help you coming into La Source as well as in several other turns. Push the brake balance as far forward as possible here. Most turns require no braking or just a slight pressure on the brakes. So pushing the balance forward will help prevent any oversteer. La Source is the only place to test your brakes. Once you start locking the brakes up uncontrollably you have pushed the balance too far forward. At that point click the balance back a bit and you should be set.
Goals
You should aim for a qualifying lap of about 3:17.0 to 3:19.0. That should put you pretty far up the grid. During the race you should aim for 3:18.0 to 3:20.0 for your lap times if you don't encounter traffic. You won't loose several seconds just by reading this, that takes practice and experience. But, hopefully, it will help you get there faster.
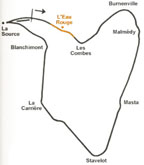
L'Eau Rouge
- Entrance speed : approximately 165-170 mph
- Speed through the corner : approximately 130 mph
- Arrival time at the corner : 4.06 seconds
- Time to negotiate the corner : 6.30 seconds
- Exit time of the corner : 10.36 seconds
Approach
Welcome to the trickiest corner in Grand Prix Legends. At least you get to do it at the start of the lap. That way you can screw your lap up ten seconds after starting it, leaving you with about three minutes and ten seconds to think about the next try. Joking aside, it is a great corner. It's fast, starts at the bottom of a hill, finishes at the top, and is blind. What more could you want?
The key to being fast through Eau Rouge is to be gentle and smooth, no matter what. If you make a slight error, don't compound it by stomping on the brakes or the accelerator, just carefully correct and get on with it. You'll be approaching this turn coming downhill past the pits. You probably won't have made it to top gear yet, which is fine. You don't have to downshift that way.
The entrance is a very slight left-hand bend. You want to be right against the wall on the left as you enter the turn. Keep the accelerator floored for your approach. Then when you are about half way along the wall - where the racing groove gets slightly darker - very gently apply the brakes to scrub off, perhaps ten miles an hour. If you brake too hard you'll slam the bottom of the car against the track as it starts to climb uphill again. You definitely do not want to do this as you'll have no traction and go flying off the track at about 150 mph. So be very gentle with those brakes.
Apex
You'll be off the brakes fairly quickly. Keep the throttle about half on and start turning gently to the right to hit the next apex of the turn. You want to bring the car right against the barrier on the right for a middle apex. This is very tricky to hit properly. If you get too close you run over the dirt and get a little loose. If you are too far away there's no way you'll be able to make the final left hander's apex properly. If you have to choose, go for the dirt. You'll be a little out of shape through the turn, but you'll get a good exit, and that is what Spa is all about - good exits.
You're now going uphill towards the final part of the turn. You want a late apex here to give you the best exit. An early one will mean that you have to back off to avoid driving off the track as you exit. So go for the late apex. However, before you worry about that you should be able to get back up to full throttle for a moment before you reach the left hander. Then just before you turn into the apex ease off again, but not all the way. You should be on the power all the time through Eau Rouge. That helps to keep the car balanced.
Exit
Go for your late apex and get right against the side of the road as you do so. Don't worry about putting your left wheels slightly off the track here. The dirt is very hard and you probably won't slip at all. The one thing you do need to avoid is getting too far to the left and running up the side of the hill. This will throw you all over the place and you'll be recovering for a long time.
As you leave the apex get back to full throttle as fast as you can and let the car drift out to the right. The following right hand bend can be taken flat out in almost anyway you like. Then power off down the road and get yourself together for Les Combes.
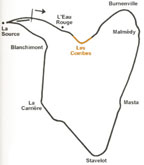
Les Combes
- Entrance speed: approximately 175-180 mph
- Speed through the corner: approximately 90 mph
- Arrival time at the corner: 23.86 seconds
- Time to negotiate the corner: 7.49 seconds
- Exit time of the corner: 31.35 seconds
Approach
Les Combes is quite simple after Eau Rouge. The one thing you need to remember is not to brake too late, especially if you are being followed closely. If you brake late, you'll slide wide. This probably won't affect your lap time much, but the guy behind will be able to get inside you and then you'll have a big problem keeping ahead. So if you're not sure, brake a little early.
The left hander of Les Combes is preceded by a slight right hand bend. This can almost be taken flat. You'll be approaching this under full acceleration in top gear. A late apex is important for a good setup into the left hander. So position the car on the left side of the track for the right hand bend. As the racing groove starts to darken begin to pull the car over to the apex. Keep up full acceleration as you do so. Then once you're about half way there, ease off a little on the throttle. This will help you turn in a little more and hit the apex. Then once at the apex get back to full throttle again for a moment. You'll gain an extra tenth.
Apex
Remembering that we don't want to go wide here lets talk about braking. Hard braking is not the way to go at the beginning. You're exiting a right hander when you start to brake, so you'll most likely lock up your right front if you brake too hard. But you need to turn left. With your right front locked and the direction of the car being towards the left you'll end up quite close to the left side of the track very soon. You will still be going quite fast and therefore go wide, and be passed. So you need to be gentle on the brakes to begin with. Use the engine to help you through this one.
Exit
Brake gently just before the racing groove starts to darken. Then steadily increase the pressure on the brakes as you shift down a few gears. You should aim for a middle apex here, which you will then hold around the rest of the turn. Get off the brakes as you start to turn in. Shift down one more gear and let the engine slow you the rest of the way. The beginning of this turn is done with no brakes and no throttle. The car will turn in to the apex that way. Once there, slowly get back on the throttle in preparation for the exit. Remember exits are key and you have a long blast coming up - basically through to Malmedy.
About three quarters of the way through the turn really start to get the power on the let the car push itself away from the apex. Shift up to third and power out of the turn getting as close to the right side of the track as possible on your exit. A good exit here will let you pass someone before Burnenville The following left and right hand kinks can be taken flat. Hit their apexes in the middle and keep on going.
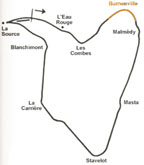
Burnenville
- Entrance speed: approximately 190 mph
- Speed through the corner: approximately 160 mph
- Arrival time at the corner: 47.45 seconds*
- Time to negotiate the corner: 13.42 seconds
- Exit time of the corner: 1:00.87 seconds
(*This is when you are passing under the Bardahl bridge.)
Approach
Burnenville is really quite simple. It's only a matter of how long you keep the power on for. You'll be approaching this one in top gear almost flat out. The turn tightens up as you go, but as it's over half a mile long, don't hold your breath for that. Enter the turn in the middle of the track as you go under the bridge. Using the racing groove as a guide continue through the turn. As long as you don't get on the dirt you'll be fine. I wouldn't recommend overtaking here. Too risky. Anyway you have a great over taking opportunity coming up at Masta.
Apex
Once you pass the final set of houses on the right you'll have to ease off a little. Make sure you are not too close to the right side of the track when you arrive at these houses or you'll have to back off a lot to stay on the track. Likewise if you are too far to the left you'll also be off. Aiming just to the right of the racing groove works pretty well.
Exit
You'll be on full steering lock through this next part. As you go keep trying to get the car back to full throttle. When you start to understeer, back off, then try again. Eventually you should be able to get back to full throttle before the end. Make sure you don't get too far to the left though, or you'll be completely off line for the entrance into Malmedy.
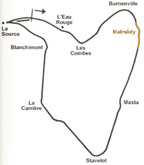
Malmedy
- Entrance speed: approximately 160-165 mph
- Speed through the corner: approximately 110-115 mph
- Arrival time at the corner: 1:02.03 seconds
- Time to negotiate the corner: 11.63 seconds
- Exit time of the corner: 1:13.66 seconds*
(*This is when you are leaving the final right hand apex.)
Approach
Right after you come out of the long right hander of Burnenville you'll be thrown into the roller coaster ride that is Malmedy. This turn is almost as difficult as Eau Rouge, and starts the downhill run towards Stavelot. For those who have some experience at Laguna Seca it's a little reminiscent of the Corkscrew, except about ten times more difficult.
This turn has two parts to it. The first one is nowhere near as important as the second part. You must get a good exit out of the second part as it leads onto the longest straight of the lap. In order to get a good exit you need a good clean entrance to it. Keep this in mind as you start to go through the first part.
You'll be in top gear coming out of Burnenville as you near the entrance. You need a mid to late apex here. If you hit it too soon you'll be out of shape going into the middle of the turn, and then there goes you good clean entrance into the final part of the turn. So don't get right against the left side of the track as you approach the turn. Stay a little to the right of the racing groove. If you are too far to the right, though, you'll have to slow down quite a lot to make the turn. Just before you reach the 200 brake marker - the second one you come to - brake gently and shift down a gear, and start to turn in. Continue with slight pressure on the throttle as you finish braking. Bring the car into the turn a hit the apex just past the middle of the turn.
Apex
You'll be going in a straight line for a moment now. Brake a little more and shift down again. This shift is optional. It depends on your gearing. I find that it helps me keep the car balanced. So try it with and without the shift to see which works best for you. You will need to brake though. If you don't you'll be oversteering all over the place as you go down the hill - see the note about bad entrances to the final part of the turn above.
After you've finish braking get back on the accelerator to balance the car. The descent of the road increases quite a bit here. Just before the crest, begin to turn the car towards the right for the next apex. The flags on the right are a good guide for this as well. However, after you really get to know the turn you'll hardly use them. You want to hit this apex near its middle. About the same time as you hit the apex you should be getting back to full throttle again. This will help push you down the track.
Exit
Let the car drift out from the apex towards the middle of the track. This is where your good entrance / exit begins. It's a straight shot from here to the next apex. You should be able to get back to fourth gear before entering it. Make sure you are done shifting before you really hit the apex or you'll unbalance the car for a moment as you do so. Hit this apex in the middle, briefly, and then let the car follow the racing groove to the final right hand apex.
The goal here is to keep a straight a line as possible down the hill. If you are sliding you'll be slow. But don't back off, even if you are sliding. You'll get to the final apex just past the middle of the turn. Hit it and keep the car going in a straight line. After the apex, shift up and let the car drift out to the left. Just watch for that wall on the left side of the track, and then blast down towards Masta.
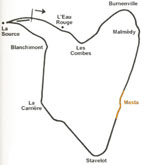
Masta
- Entrance speed: approximately 198-200 mph
- Speed through the corner: approximately 170 mph
- Arrival time at the corner: 1:32.93 seconds
- Time to negotiate the corner: 3.81 seconds
- Exit time of the corner: 1:36.74 seconds*
(*This is when you are leaving the right hand apex.)
Approach
Masta is a fairly simple turn. Its speed is what makes it so tough. It is also the best passing opportunity on the entire track. If you got a good exit out of Malmedy you should be able to draft your opponent down the long straight coming into Masta. If you get alongside on the inside you'll be able to get by, as the other car would be extremely foolish to try to make it two wide through the turn.
You have tons of time to set up for this as the preceding straight is so long. You'll be at almost 200 mph in top gear. The key is to be smooth. Any jerky movements will see you flying into something. Position the car on the right side of the track, but not right against the edge of the track. You want to hit both apexes early. If you are too far to the right you won't be able to make that goal.
You don't need to brake or shift down for this turn. Continue under full throttle as the racing groove starts to darken. After a beat or so ease off the throttle about half way and start to turn in. You want to hit the first apex early and as close to the hill as possible. Putting a wheel onto the dirt isn't bad at all, so really try and get close to the edge here.
Apex
This turn is very long, just watch the TV2 replay. The hardest part now is to decide when to let the car start to drift away from the apex. I'd say half way through the turn is about right. Any sooner and you'll hit the barrier on the right hander. Any later and you'll be scrubbing off too much speed. So when your about half way through the turn - a location which will take experience to determine - let the car ease away from the apex.
Exit
Keep the throttle about half way down and straighten the car out. You don't need to turn it to the right just yet. Going straight will line you up correctly for an early apex at the second half of the turn. The second half of the turn is not as sharp as the first half. With this in mind when you arrive at the apex get back to full throttle and turn a little to the right. You want to get right next to the barrier as you go by it. Power out of the turn letting the car push itself over to the left side of the track. You should end up right on the doorstep of the house as you exit. I wonder how many times that stoop has been rebuilt?
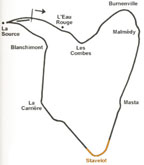
Stavelot
- Entrance speed: approximately 198 mph
- Speed through the corner: approximately 125-130 mph
- Arrival time at the corner: 1:50.31 seconds*
- Time to negotiate the corner: 8.03 seconds
- Exit time of the corner: 1:58.34 seconds**
(*This is when you are easing off the throttle for the first time. **This is when you are passing the end of the wall on the right.)
Approach
After Masta you have a longish run down towards Stavelot. It's all downhill and you'll be back up to about 200 mph again. I wouldn't suggest trying to pass here, unless you get alongside before you begin turning. It's just too risky to go side by side through here.
Apex
Like Masta, Stavelot requires no braking. It can all be done on the engine. You'll be in top gear as you approach the turn. Beginning just left of the middle works well here. The racing groove darkens for a moment, then lightens again. Follow the groove into the turn and when it darkens for the second time ease off the accelerator slightly. Pull the car over to the right side of the track more as you go through the turn.
Exit
The turn tightens up as you go. This means you'll have to slow down the further into it you go. Don't use the brakes, they'll just make you loose traction at the rear. To loose speed, ease off the accelerator a little more. Then when you get to the hay bails on the left shift down a gear as your revs should be low enough then. Keep the car close to the right side of the track and when you near the wall on the right shift down once more. Push the accelerator down more now to try to keep your speed constant. Then once you've passed about half the wall start to get back up to full throttle again. You should be able to get back to fourth gear about the same time you reach the end of the wall. You'll probably power slide out a little bit, but that's fine. Continue out of the turn, letting the car push itself out to the left side of the track. If you can keep it on the racing groove, fine, but don't make that a priority. Like all the other turns, your priority is to get into top gear as soon as possible.
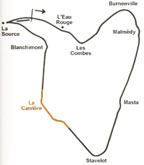
La Carrière
- Entrance speed (the first right hander): approximately 185 mph
- Speed through the corner (the first right hander): approximately 165 mph
- Arrival time at the corner (the first right hander): 2:17.04 seconds
- Time to negotiate the corner (the first right hander): 2.66 seconds
- Exit time of the corner (the first right hander): 2:19.70 seconds
- Entrance speed (the second right hander): approximately 180 mph
- Speed through the corner (the second right hander): approximately 130 mph
- Arrival time at the corner (the second right hander): 2:24.62 seconds
- Time to negotiate the corner (the second right hander): 3.14 seconds
- Exit time of the corner (the second right hander): 2:27.76 seconds
Approach
This double right hander is fairly simple after the previous few turns. The only thing to remember is that you need a really good exit out of the final right hander as you have a long straight down towards Blanchimont. The first right hand turn is preceded by a left hand kink. You'll be in top gear as you approach it. The turn is taken flat with a late apex. That will set you up correctly on the left side of the track for the right hander that follows.
Apex
Now the first right hander. It's fairly simple, with a slight lift being all that is needed. The tree on the right is a really good marker for turning in. Just before you get there start to turn in a lift off a little. This will help give the front wheels a little more traction and turn you into the corner. Aim for a middle apex. Don't worry at all if you run over the dirt here. If you are wide at the apex you'll be wide on the exit and run up the embankment at the edge of the road. So keep tight to the inside and don't worry about running over the dirt.
Exit
As you exit the turn get the power back down just after the apex and let the car move over to the left side of the track. The following right hander does need some braking and also some shifting. As the racing groove starts to darken brake moderately and shift down two gears. Then turn the car into the apex, hitting it just after the middle. Again don't worry if you run over the dirt at the apex. Running up over the embankment as you exit is far worse than kicking up some dirt.
As you hit the apex get back on the power to get the best top speed down the following straight. A slight power slide will probably happen on the exit. Just correct with the steering a little and get on your way.
Blanchimont
- Entrance speed (the first left hander): approximately 185-190 mph
- Speed through the corner (the first left hander): approximately 120 mph
- Arrival time at the corner (the first left hander): 2:45.87 seconds
- Time to negotiate the corner (the first left hander): 3.66 seconds
- Exit time of the corner (the first left hander): 2:49.53 seconds
- Entrance speed (the second left hander): approximately 140 mph
- Speed through the corner (the second left hander): approximately 140 mph
- Arrival time at the corner (the second left hander): 2:51.40 seconds*
- Time to negotiate the corner (the second left hander): 1.74 seconds
- Exit time of the corner (the second left hander): 2:53.14 seconds**
(*This is just before you turn into the apex. **This is just after you leave the apex.)
Approach
Blanchimont's double left hander is quite fun, especially after the long straight you've been down. The first left hander is preceded by a right hand kink. This is taken flat with a late apex placing you on the right side of the track.
Apex
The racing groove gets darker as you approach the left hander. Continue past this until it lightens again. Then brake moderately and shift down two gears. You need to make an early apex here. Be careful though. Hit it too early and you'll be flying off onto the embankment as you exit. Likewise too late, and you'll have to slow down far to much to make the turn. So early, but not too early.
Keep the power on slightly as you finish braking. Then once past the apex let the car drift out to the right a little before increasing your acceleration back to full. On the short straight between the two parts of this turn you don't want to get too far to the right. It'll screw up the entrance to the final part of the turn.
Exit
You'll be able to shift up a gear just before you reach the next left hander. Then turn in to hit the apex at about the middle of the turn. Keep the power on all the way through this turn. Like several of the previous turns, don't worry about kicking up some dirt here. You don't want to go wide or you'll have to back off to make the following right hand bend. Take this turn properly and you should be able to make that kink flat out.
La Source
- Entrance speed: approximately 165 mph
- Speed through the corner: approximately 35 mph
- Arrival time at the corner: 3:05.04 seconds
- Time to negotiate the corner: 7.40 seconds
- Exit time of the corner: 3:12.44 seconds
Approach
Welcome to La Source. The final turn on the lap, and the only one that requires any serious braking. After a long lap, don't screw it up by trying to brake too late and running into the hay bails. The slight left hander beforehand can almost be taken flat out. Turn in and lift off the throttle slightly to hit the apex just after the middle of the turn. Then once at the apex get back to full throttle and let the car drift out to the right, watching the armco barrier as you exit.
You'll be in top gear under full acceleration as you come into the braking zone for this turn. You need to be on the left side of the track for this. Make sure that you get there carefully and smoothly. You don't want to jerk the car over to the left or you'll loose some speed and risk being at an odd angle when you start to brake.
Apex
There is a small lone tree or bush on the left side of the track which is a great braking reference point. Just before reaching it brake as hard as possible in a straight line. Start shifting down to second gear as you brake. Leave your shift to first until you are turning in. Any sooner and you risk locking the rear wheels for a moment and spinning.
Exit
Turn in just after you pass the end of the armco barrier on the right. Pull the car in for a mid to late apex. You want the maximum acceleration possible as you exit, so hitting the apex later is better, as you'll have a straight shot out of the corner. Keep a slight amount of throttle on as you turn in. Once you get to the apex start to increase your acceleration. Once you reach the end of the curbing on the right you should be able to get back to full acceleration. Let the car move over to the left side of the track as you accelerate down towards Eau Rouge again.
Downloads
- File:GPL trackguide Spa by LOR.pdf
- Setup(s) and Replay(s): File:Spaall.zip


