GPL Track Creating - The Beginners Guide Part 3
Authored by the GPLEA
Traces & Walls
Ok, we've now got the track shaped like a rather dull oval. But we need a bit more before we can try to compile this. Take a sip of your coffee while you read about...
Traces
Traces are the blue lines you see on each side of your track now. Their primary use is for defining elevations, but nothing (except dedicated objects) will be drawn outside the traces. And you'll need to keep them clean, when you have added several traces, it can look quite a mess in tight corners, and be difficult to handle. So lets add a trace on the outside of the track, defining the leftmost border. Start out by clicking on the top of the tree...(TRACK)
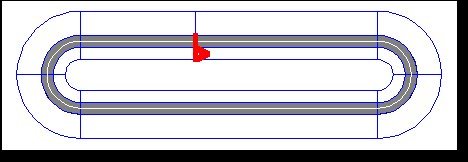
Here you see two traces. Between them is the track, or asphalt. The centerline of the track is defined as zero- negative is right, positive left (this is common in more files, which we'll see later. So remember it!). Right Click on Trace0, and select "Add before". You now have a blue line on the infield, and a New Trace0 at -295275 by default. Right Click on Trace1, and "Add After". Bing! Another trace on the other side of the track at 295275, and read "Meaning": It's 14.99997 metres from the centre of the track. Knowing the track is 10m wide, this gives you a run off of 10m. Not much, so lets move it a bit out! DoubleClick on Trace 3 to bring up the DialogBox, and change from 295275 to, say, 495275. More comfy now with 20m of run off to the outside. Here's how mytrack.gtk looks:
Note! Don't place a trace at position 0! trk23dow will not like it!
Ok, more about the usage of traces later, you want to know that you can have up to 16 traces in total at a track. They need to be planned before adding, but more on that later! Now, this track is still useless, unless we add something beside the track itself, and that means....
Walls
It may sound silly. Flat walls. Doh. But the gray you see on your track is actually a wall too. So, if asphalt is a wall, so is everything else. Here's a short list of wall (surface) types:
| Surface Type | Is | Feels Like |
| 1 | Tarmac (asphalt) | Well, er, like a dry racing track. |
| 2 | Concrete | A bit more slippery than tarmac |
| 3 | Curbs | Same grip as Concrete, or thereabouts |
| 4 | Grass | Slippery!, bumpy |
| 5 | Dirt | Dusty, slippery, bumpy |
| 6 | Gravel | Very Dusty, sticky, slippery, bumpy |
| 7 | Banking | Sticky, soft, dusty |
Those were the most common types, but then you have these walls for other purposes....
| Surface Type | Is | Feels Like |
| 2045 | It's there! | You can drive straight through it, nice for bushes |
| 2055 | Soft and sticky | Great for walls of haybales or tyrewalls |
| 2056 | Hard! Devastating! | Excellent for armco, rows of trees, fences.. |
| 10 | Um... | These need to be on the extreme left, otherwise your track won\'t load! |
Ok, so how do we go about adding these walls? Thanks to Peter, there is a great feature in GPLtrk that will save us loads of work, so we'll add the basic walls first, starting with Section 0. The plan is as follows: we'll need grass on each side of the track, some fencing on the right, and some trees on the left to block the view into infinity, and the wall type 10 to make our track load. But in addition to this we'll have to start the mytrack.tex to tell trk23dow (the compiler) what we want to be drawn on a 2056 wall! Let's do the walls first...
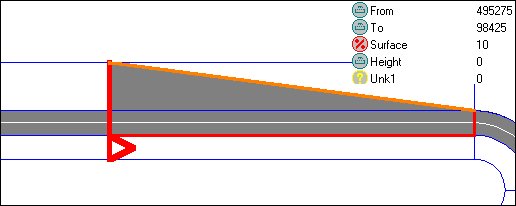
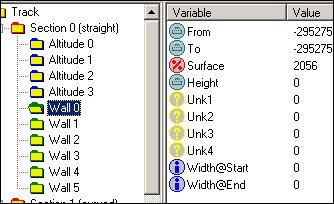
Start by zooming in a bit on Section 0. Double click the gray track itself, so you have an orange border indicating this is the wall that you're reading about in the top window. On the tree in the left top window, you'll see one of the small folders open; this indicates which wall you are working on. When you're getting a lot of the walls (10-18 walls is normal), this is nice! Click on this open folder called Wall 1, and you'll see that this is type 10, the leftmost and required border. You'll want this border to be on the outmost trace, which we know is at 495275. And this wall is at 98425 isn't it? Well, DoubleClick (aaargh, from now on it's DC, ok? And NOT Squarehead!) "FROM", and paste or type 495275 to replace 98425. Now it looks a mighty mess; like this to be exact:
Um, we'd better bring the "TO" Value to the same place (Get it? "From" = The start of the section, "To" = The end!)
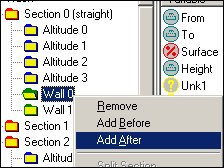
Now, this still isn't what we're after. Since we can't get a texture on a type 10 wall, we'll need something to disguise it. A 2056 type wall is very nice for trees! What you can see now by selecting Wall 0, is that it stretches from the right side of the track all the way to the left border. So we'll need something in between. Right Click in the tree, and select "Add After".
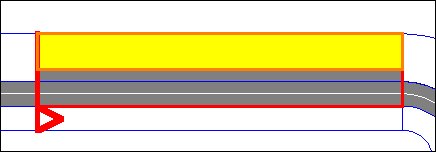
Even though it's not too easy to see you now have a new wall. By default this is surface type 1 (asphalt). We want to change this to a 2056, so we click on the new wall (which is now wall 1), click on surface type, and in the box you enter 2056. Now you should have a bright yellow wall, and it should all look like the pic below.
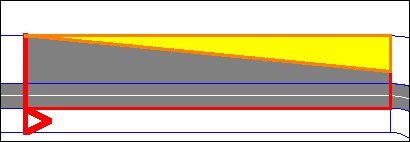
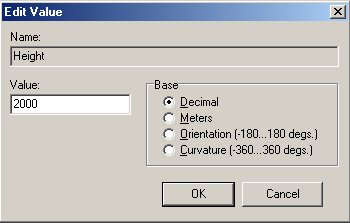
The thing is, your 2056 wall is now 15m wide. No good, you want to tuck it right up to the outside (wall 2, type 10). But a wall *must* have some width, or the compile will fail or go badly wrong. So we take the positioning of the outside wall which is 495275, pull off a few digits to give it width, say, 495273 and add this value to the From and To fields of the 2056 wall.
Here, the from value is set to 495273...and when the To value is changed as well, the yellow wall is so thin it won't be seen. But now the track stretches all the way out again, so we need something in between....Again, right click in the tree, chose Add After...
The orange frame now shows the new wall 1, DC this wall, and change surface type to 4....
Bingo! Grass! Now we want that grass to tuck right up to the edge of the track; so we have to change the To and From values again. Now, we know that the left trace at the edge of the track is at 98425, so this is where we want the grass in mytrack. What you staring at? Change the To and From, from 198424 to 98425.
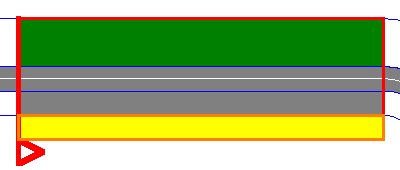
Now we need to add two walls before Wall 0 to add something to the infield. Just RC (RightClick) on Wall0, Add Before, RC, Add Before. Change the surface type of Wall 0 to 2056 (so we can't drive off limits!) and this is how it all looks now:
Now, that Wall 0 needs to be moved a bit so it doesn't cross that Trace at -295275, so change it's To and From to -295275. To get some grass on the right as well, change surface type of Wall 1 to...hmm, 6 (Gravel), and it should all look like this:
But Hey! Look at the width of our wall 0! It's 0! Bad!
You adjust this by moving the wall next to it a bit, this wall 0 is From and To -295275, so let's change the values for Wall 1 to -295273. Wall 0 now has the width of 0.1016mm! But it's something! Enough even!
Ok, time to breathe. For these walls to be effective retainers, they'll need height. On the right, we plan to use armco, which is normally about 1m tall, so go to Wall 0, DC on "Height", and type 20000 (=1,016m). Move on to the outside 2056 wall (wall 4, not 5!), and a typical tree height is um...say about 5m. So enter 100000. Wall 5 needs height too (the outside boundary wall must have height too!), so add a token height to this wall of 2000.
See something else? Right, wall 5 doesn't have width...so move it To and From 495277 (it used to be 495275). Whew! Worst part of walls teaching done! Now SAVE!
Right now, the only texture you'll see on those trees is the error texture, because we haven't defined them yet. Ready for that? Let's add one more wall!
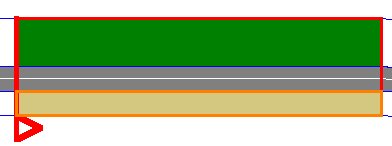
Click on wall 3 (the grass) and select Add after. You'll now get an asphalt wall behind the grass. Change this wall (by clicking on it) and change surface type to 4 (grass), move it To and From 136849. Now change surface type of the grass wall next to the track (wall 3) to 2055, give it a height of 10000. This will be a wall of haybales, more explained later! Now, DC on "Unk 4" while you have selected the wall 3. Enter 98, click OK. More on this later...muahaha!
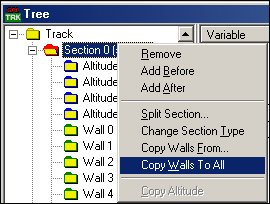
Now go to the tree on the left, select/highlight Section 0 (be sure you have Section 0 - the section with all your nice Walls - selected !!!) Right Click, and select "Copy Walls to All".
Now this is how your track should look! SAVE!
The thing is, you now have a wall next to the track all around it: boring! Double Click on one of these walls, say wall 3 section 6, Right Click in the tree on wall 3 while this section is highlighted, and choose "Remove". ZAP! Wall gone! Change The From and To values of the grass to bring it back to the track, change to 98425. Repeat this for all sections except Section 0, we want to keep the hay here! Now it looks like this:
This is how it looks now! All well? Then SAVE, and move on to how we are going to make it all look beautiful!
Updated: 6-Jan-2001
Transferred to the wiki: 30.04.2009

