GPL Track Creating - The Beginners Guide Part 2
Authored by the GPLEA
2: Creating Corners & Straights
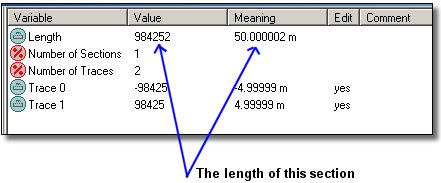
Now it all starts. From explorer, double-click gpltrk.exe and your screen is filled with.......lovely grayness! I suggest you make a shortcut to GPLtrk right away. From the menu, choose File, New. Presto! You now see a length of gray, the red arrow pointing the direction of the track. This is your first section, and it defines the start/finish line, and a following straight which is 50 metres long. A short explanation of the top window:
You will not use normal numbers, but use decimals (listed in the Value column). You can always see the true meaning of this under...er "meaning". Now, 50m may be a long way to run, but not to drive, so let’s up it a bit. The info you see now is just that; info. So you'll need to expand the tree on the left...this brings up:
Now, double click on "Length". Change the value from 984252 to 2984252. Your first section is now 151.6m long! (as a very rough guide, 20000 = 1 metre). Enough for a quick stab in 2nd gear!
Now is perhaps a good time to zoom out. You can do this by right clicking while holding the cursor in the "graphics area" (the lower 50% of the screen).
WARNING! Be careful when you zoom in, as GPLtrk may crash your PC if you zoom in too much. Try it for the hell of it, and you'll get the idea.....but maybe you want to save your track first:
File-> Save As, "mytrack.gtk"
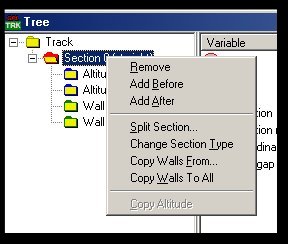
Ok, now we're gonna add a corner, to make things interesting. In the tree on the left, RightClick "Section0", and POP UP! Menu appears.
Now choose "Add after". By default, GPLtrk will now add a section identical to the previous, so you have another section of straight....Buuut, we want a right hand corner! To do this, right click on your new Section, and choose "Change section type". It will now curve gently left. I'm gonna keep this simple, now you have a host of other options on this sections since it is curved!
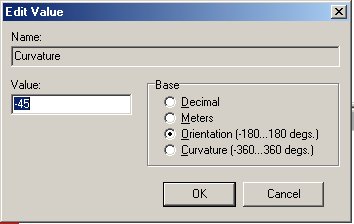
The first thing to notice; negative curvature means that the turn goes right. Double Click on "Curvature". In the box that appears, select the Radio Button for "Orientation, change this to -45 (degrees!). And click OK.
Now you have a very long right hand bend, slightly jagged. Double click on Curvature again, and check that "Orientation" now displays -90.
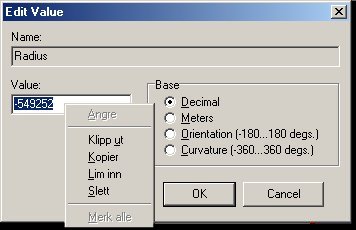
Now, Double Click "Radius". Check for "Decimal", and change -8549252 to -549252. Now you have a nice curve ( a bit on the sharp side, but who cares!).
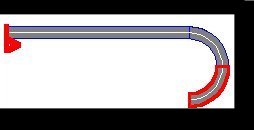
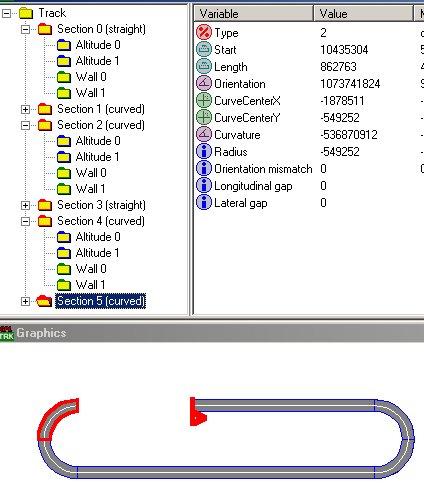
Now right click on the tree again, and select "Add After". Another section is added, a copy of your last turn. If all is well, you should now have a track looking like this:
Still going? Good! Now click on "Add After" (you know the routine, right click on the last section, and....). Whoops, that turn now makes you feel dizzy! Er, so right click on that section again from the tree, and Change Section type. You now have a small straight. We're making an oval now, so we want to make it a bit longer! DoubleClick on "Length" in the right top window, and in the dialog box, the length is 862763. Change this to 4862763 just for fun. Your "Bottom straight" is now longer than the top one.
Now we add two more sections like the other turns we did: Add after, change section type....and we want to make sure this turn section is exactly like the last turn we made...So we first change the "Curvature" of our last section ( Section 4) to the same as section 2 or 3 by copying the Radius....
(Never mind the Norwegian text) by using copy (from section 2 or 3) and paste into section 4. You have the curve looking familiar?
Now, select section 4, RightClick, and "Add After". Yoohoo! We're now heading back toward the Start/Finish!
Right Click Section 5, Add After, Change Section Type, you now have a straight bit heading for the GOAL! Only problem is that there is a nasty gap here. And it is vital that you match your last section up to the first section as perfect as possible. If not, freezes, and rapid rides back to the desktop etc are the result. But since we've played it safe here, we've already got the heading right, we just need to fill that gap! And this is easy! Click on section 0, and look under "Longitudinal Gap". You'll find the number 1015748. What?
Here comes the easy part! Fire up the Windows Calculator. Now find the length of your last section (6) which is 862763, add the gap which was 1015748. The sum is 1878511.
Select Section 6, DoubleClick "Length", and paste in the Sum from the calculator - Click OK.
Cool eh? A Perfect track! No gaps or mismatches! SAVE! SAVE!
A hint: Try to match up the final sections after you have made a more difficult track...You may now sit back and relax, loosen up your mouse-wrist and neck. We've just started!
Updated: 6-Jan-2001
Transferred to the wiki: 02.05.2009
